Chris, the author of the traj plugin, has released a new version (0.5.1) with new functions – it is easier to use and more powerful! Also, a few days ago, windy updated the web version of their product and made it much simpler to work with plugins. So let’s have a look:
When you now click on the “Hamburger menu” (three horizontal bars, left top) and then “Install Windy plugin”, you see a gallery of approved plugins with an example screenshot, description with a link to more detail – scroll down to “Trajectory”, click “Open” and you are done!
The traj plugin is now structured into a large parameter pane on the left, and a small operations menu center bottom – first, set all your params in the left pane, then run the operation from the operations menu.
Any parameters you set will be recorded and come up as before when you run windy.com again.
Example: parameters for a typical 2-hour summer season balloon ride
- “Select levels” – select all from 100m to 1500m
- “Select models” – ecmwf, gfs, iconEu (all are done in one go now – no more clicking “Start”, wait, change forecaste model, iterate!)
- “Settings” – ascent/descent: 0 m/s, duration 2:00, everything else default
- “Airspaces” – optional. Expand the menu; in my case, I click “Austria”; in case your screen gets overly cluttered, you can remove that airspace by clicking the small white-cross-on-red button besides the country name.
Thereafter, you do not need the parameter pane any more- click it away with the white-cross-on-red button on the top to get more screen space.
Next, select a start time by shifting the time selector at the bottom to your desired start time.
Finally, select a location. I use favourites – click on the heart icon in the operations menu, and select a location. Click the heart icon again to close the location dropdown. This will set the “location picker” – if there’s a message on screen saying “Place Picker”, repeat that process – it’s very easy to accidentally deselect the location picker.
Good to go! Click “Start” in the operations menu. That button changes to “Stop” while the process is running, and changes back to “Start” when done – wait for it. You will wind up with a screen roughly looking like so:
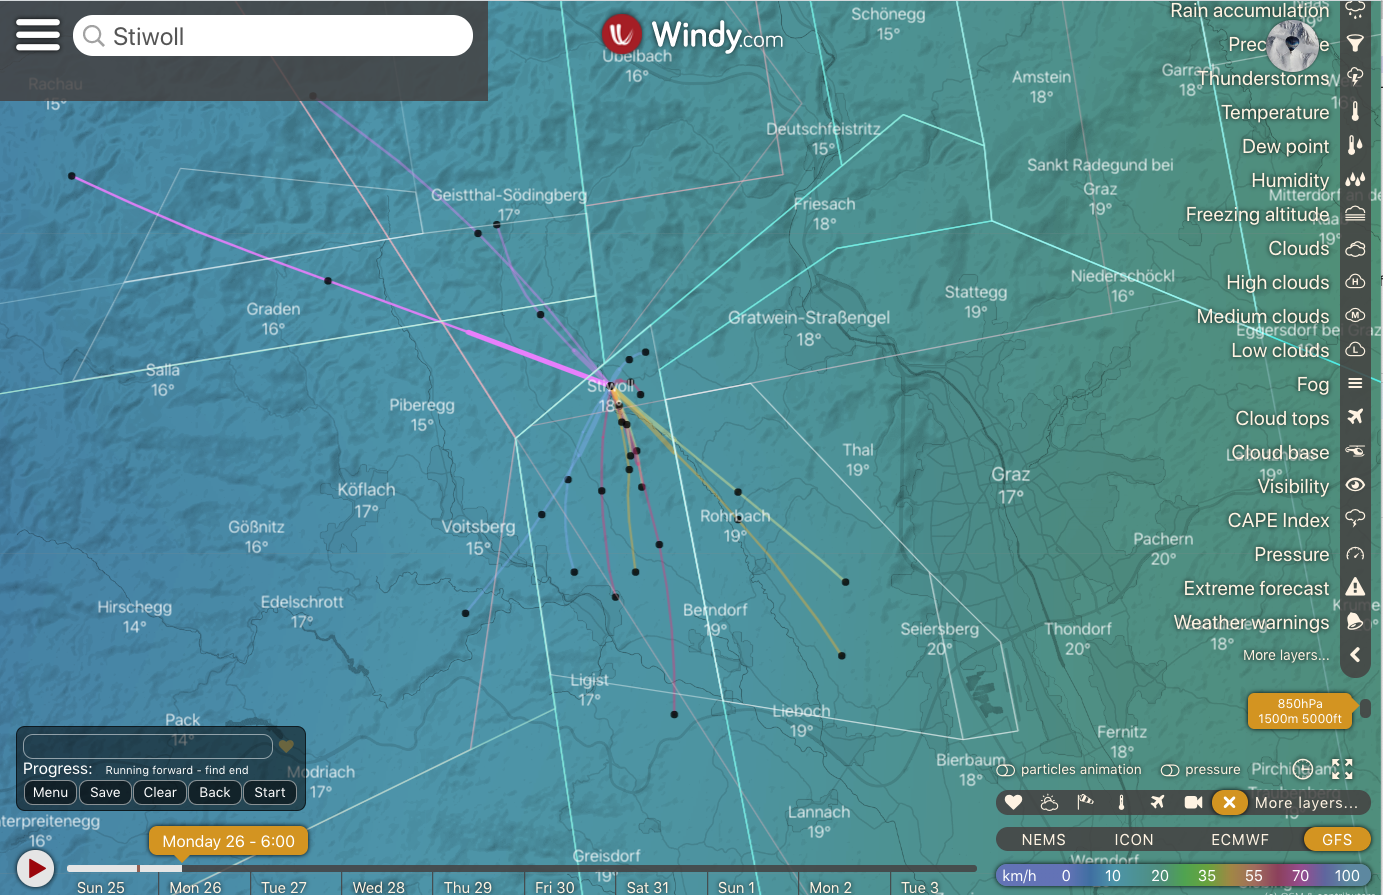
The black bullets along a track correspond to the “Marker intervals” setting in the parameter pane – I leave those as default, 1 hour.
Interpreting the results
Click on a track – a two-part panel will pop up telling you more detail about this particular track at this point:
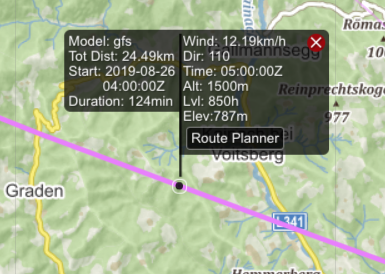
The left panel states the forecast model, and the time when the model was last updated.
The right panel shows wind speed, wind direction, time, altitude and ground elevation – so at the point we’d be roughly 700m above ground.
Note the “Route Planner” button – we’ll cover that in the next section (this function only works with tracks generated by the ECMWF model).
Usually tracks vary substantially at low levels, whereas in the free atmosphere tracks tend to converge quite closely. That degree of divergence between models for a given altitude also gives you a hint as to the likelihood of an actual flight matching the forecast. Several models agree: likely that is where you’re actually going.
I tend to believe the ECMWF forecasts most, with ICONEU a close second. But that is gut feeling and not science.
If you want to save those forecasts, click “Save” in the operations menu. The resulting file will be in GPX format and can be published for other people to see like so.
Drilling down: displaying a cross section
Click on an ECMWF forecast track, then click on the “Route Planner” button. This will split the screen vertically and the atmosphere cross section along this track comes up in the bottom half:
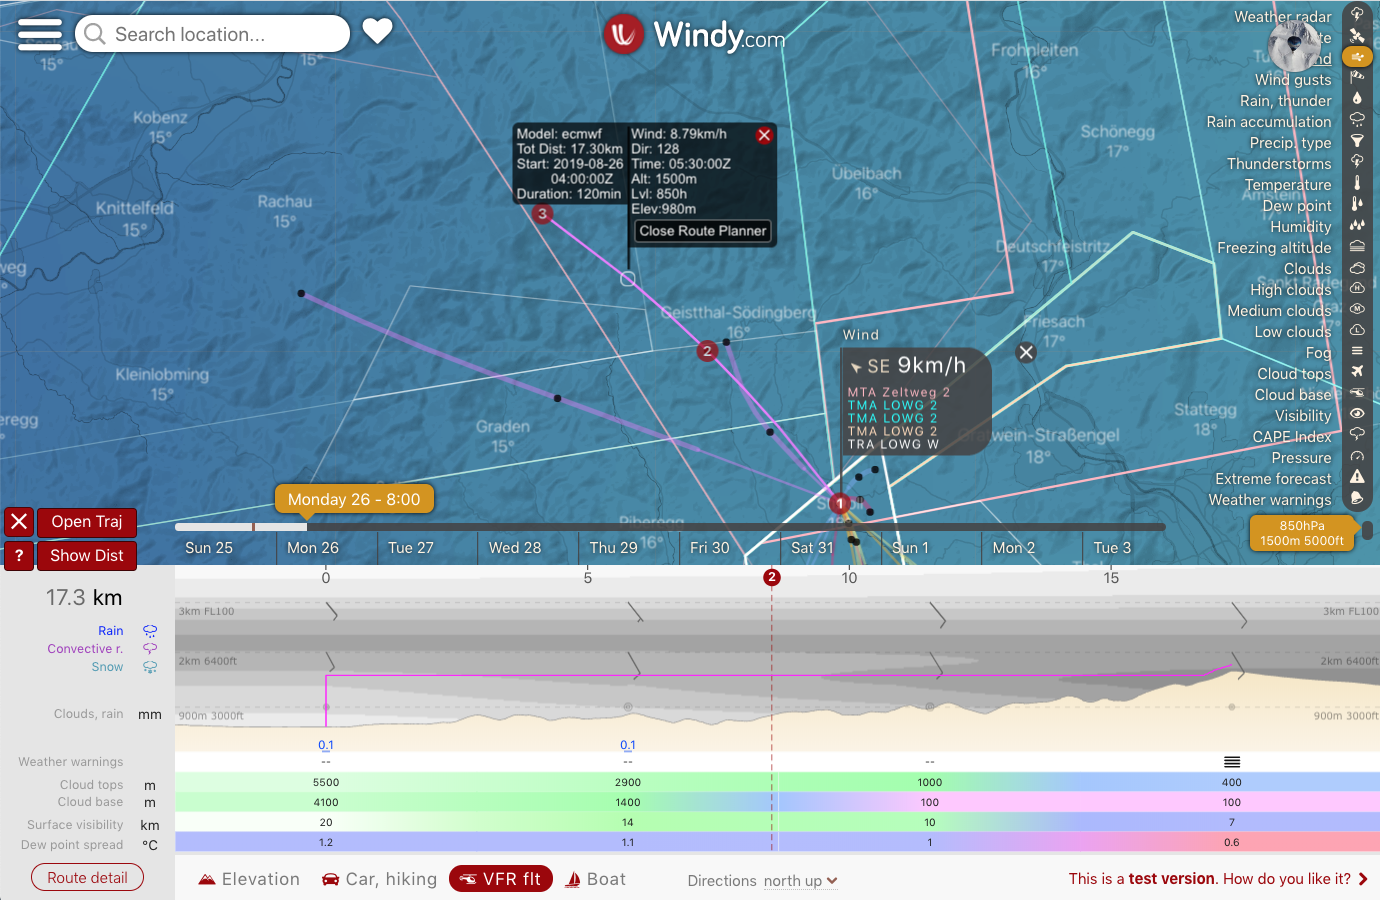
This is really handy for a quick look on conditions en route. Look here for more information on the Route planner. This only works with ECMWF-generated tracks – not for GFS or ICONEU.
Update: Route Planner just was improved (Airgram and IFR view added) and that update also shows if Route Planner is activated via the traj.
Big Fat Warning: See the “Directions north up” dropdown near the bottom of the last screenshot? There are two more options which are seriously confusing with respect to wind barbs: “from left to right” and “from bottom to top”.
You want to set this dropdown to “north up” or the wind barbs will be relative to your course(!!). That possibly makes sense for airplanes but not for balloon rides.
For an explanation, see the section “How to choose your direction on the map”.
I wrote a note on Route Planner.